Genesiv comes with some pretty awesome tools that helps you manage your users. It ranges from small warnings, to bigger suspensions and even to outright bans.
In this quick article, we’ll explain how you can “warn users”.
Why warn users? #
Sometimes members might not know they are crossing the line on some of the rules – such as sending spammy links or advertising their services without permission in your community.
In such cases, it might be a case of them not being aware that they are breaking any rules. It would then be good to let them off with a warning – instead of suspending or banning them.
What does a warning do? #
A few things will happen when you issue a warning to a user:
- He will receive the warning in his notifications.
- You get to state the reason why he is being warned.
- This would be then logged into his “Misconduct” file so that you (or other admins) can reference it in the future if he ever breaks the rules again.
Such an approach is useful when your community grows and you can’t keep track of all the different misconducts of the various users. So when someone misbehaves – you can easily pull up his record, know if he’s a repeat offended, and suspend/ban him if necessary.
How do I issue warnings? #
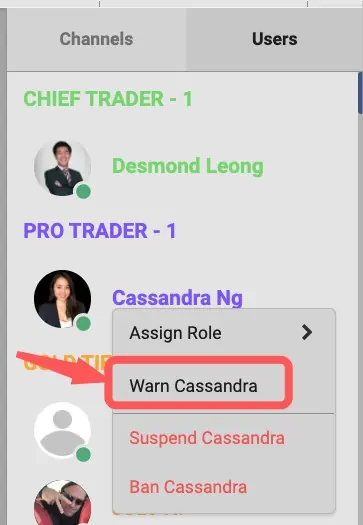
The first place you can issue warnings is directly in the chatrooms when you right click on a user:

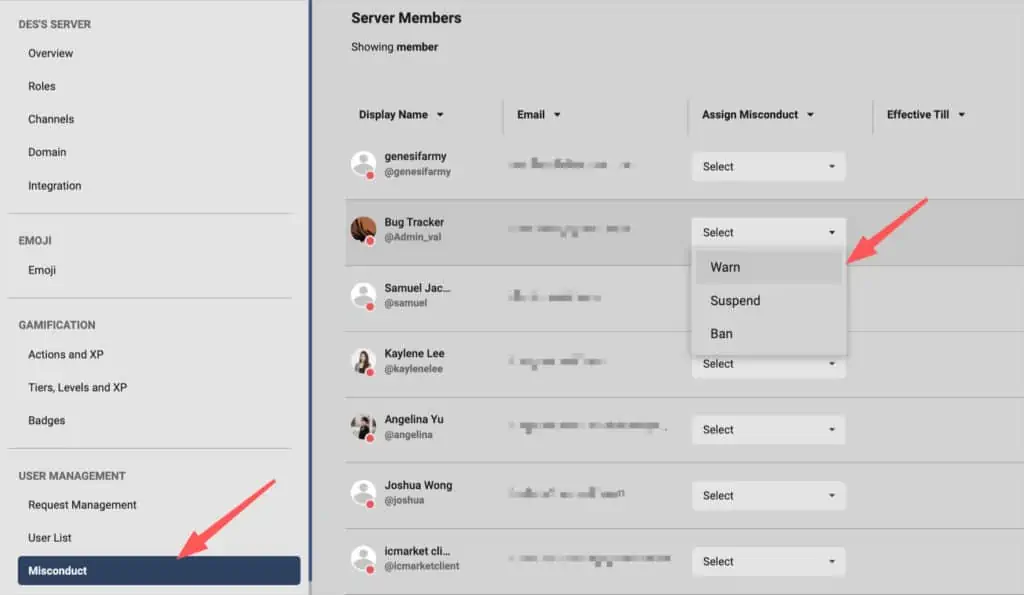
The second place you can issue a warning is from server settings > Misconduct as seen here:

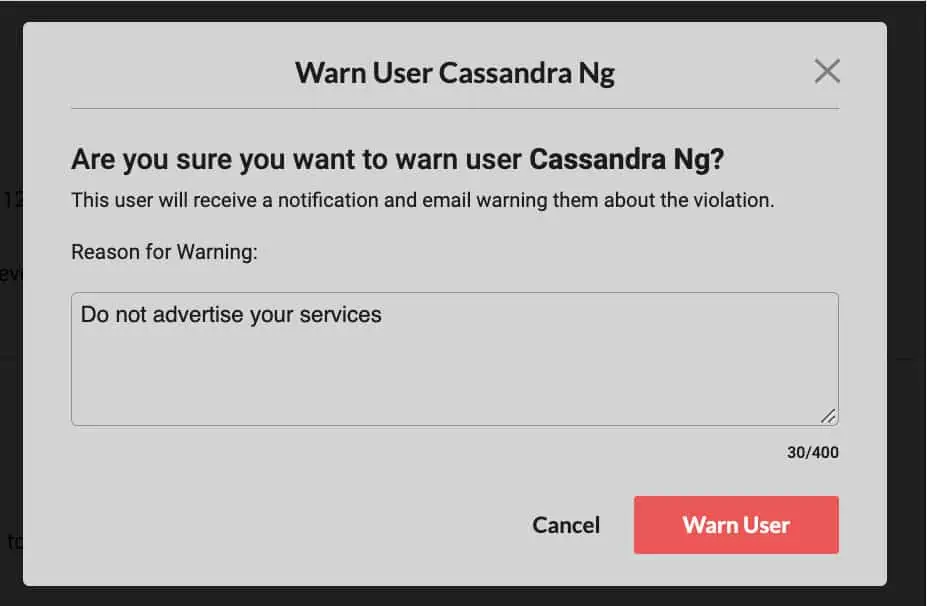
After issuing a warning, you will get to type in your reason which the user will see in his notifications:

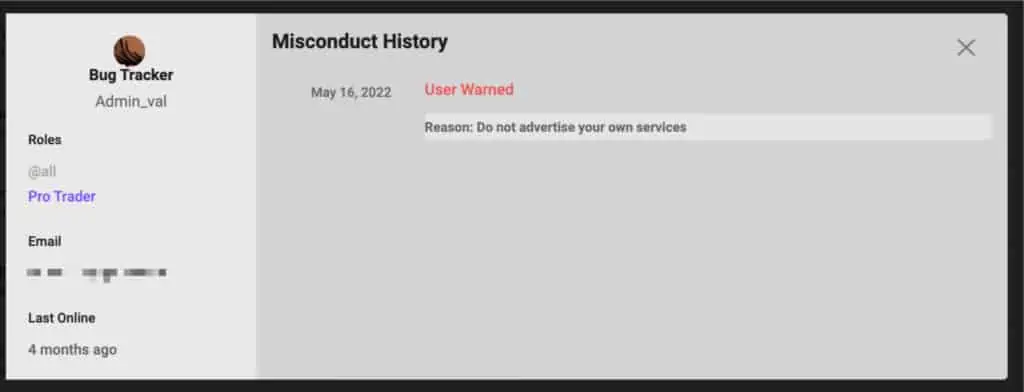
From there, you can review the misconduct history of a user from the “Misconduct” page simply by clicking the timeline “icon” beside the “Revoke” button. It would show you a pop-up such as this:

This allows you to keep track of warnings issued and of course, suspensions and bans too.


